
estimated read time - 13 min
Easily Making Kava Without a Strainer
Making kava traditionally is always an authentic experience and we believe everyone should do it at least once. But sometimes you may not have access to an authentic banana leaf or kava strainer bag personally sewn by your village chiefs wife.
Have no fear! You can still make traditional kava with some everyday materials around the house. - and it may even be better than with an authentic bag... Just don't tell the chief I said that XD
What is the Traditional Kava Method
Before we go non-traditional, we’ll first explain the basics of the traditional. Traditional kava (otherwise known as ceremonial style kava) is made with a beautiful wooden preparation bowl known as a "tanoa", medium grind kava powder, room temperature water, and a kava strainer or banana leaf-style strainer.
The real difference between traditional and non traditional is the small substitutions in the components such as bag you're using, the temperature of water, mixing bowl, plus anything else you're using to extract the "grog" (kava drink). Here we are not including any "kava extracts" such as alcohol tinctures, candies, or any other organic or inorganic solvent used to extract the actives in kava. We don't generally recommend to use these types of kava and you can read more about it in the blog post "dangers of kava extracts and liver toxicity"
First You need a proper kava strainer to knead and squeeze your kava. Authentic kava strainers are not cheap. Mostly because you have to import it from the islands. Plus the amount of time you have to wait after you order them is far from ideal. If a supplier has them in stock stateside, make sure to ask them where it's made. It may not be a real strainer and just an ad-hoc one from a factory overseas in southeast asia, where they don't even know what kava is.
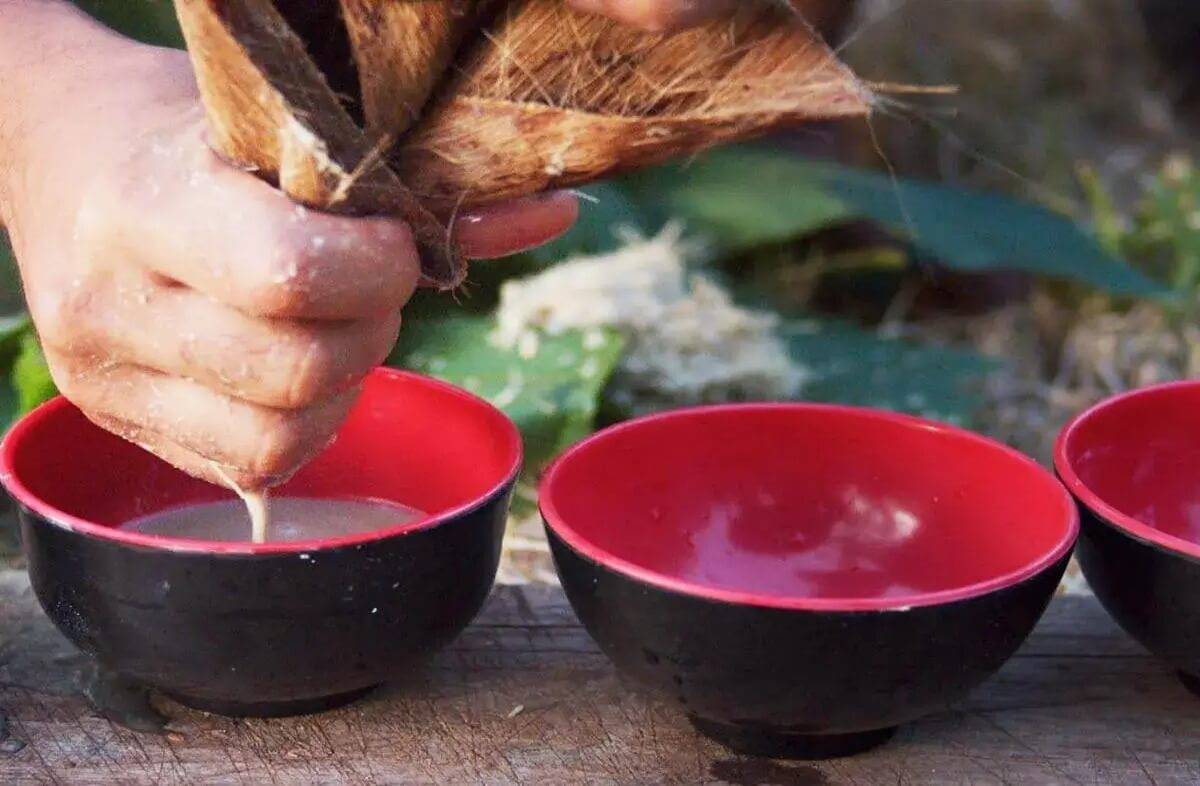
The traditional method uses only room temp water and a strainer. If you want to go the full monty with this, you can take it further by mimicking the pre-brew methods of the islander tribes. They often would chew the roots and spit them into the bowl as a way to start the ceremony of the kava drink, but it's more for chunks of kava, which you may not have.
You've seen me probably talk about making much stronger kava using fat emulsifiers. It's my favorite method but this is not a normal practice on the islands
Making Kava the Traditional Way
Using a proper kava strainer bag offers the best result in making your traditional kava.
Typically the best kava strainer mesh size should be about 75 - 100 microns. That's hard to figure out unless you're using a nylon bag but it's possible to get in the ballpark if you know the stitching thread count of whatever material you're using. We personally like 75 micron bags best because it is very consistent and tends to keep any makas (thicker cuts of the kava root) from getting into our drink.
My stomach is sensitive, so if I drink higher mesh sized bags that make drinks with makas or drink something like micronized kava, it tends to upset my stomach. There were many sessions after micronized that I couldn’t hold it down, so if you’re going down that route, make sure to have a trash can nearby in case it comes back up. If you can keep it down, you're a better man than I my friend.
Topics List
Kava with Kava Strainer Bag
How to Make Kava With a Kava Strainer Bag
Using a proper kava strainer bag offers the best result in making your traditional kava. Again a good kava strainer should be 75 - 100 microns in mesh size. You can find great 75 micron bags online in various sizes. We typically use nylon nut bags as the different materials of others don't work the best with my favorite method - the heated version using coconut milk.
Any size works best but you probably don't need a "kombucha size" or "beer brewing" sized bag as this is for very large pots. Anything from 6-12 inches wide and about 12 inches long from bottom to top will work great. If you're making for a large group look for over 12" bags.
Prepare the following:
-2-3 tablespoons of kava traditional grind powder
-16 ounces of room temperature water
-1 bowl to mix in (stainless steel kitchen bowls work great!)
-1 kava strainer bag
Process:
Put the kava powder inside the kava strainer bag. Place the bag in a big bowl but don't let the kava fall out into the bowl. Then pour room temperature water directly into the bag with kava. It helps to hold the top open while doing this. Close the bag to secure the powder inside.
Knead the kava with your hands like you're squishing a stress ball and later wringing it like you're getting the water out of a wet shirt. We recommend squeezing the material for at least 10-15 minutes. The liquid should have turned into a ligh or dark brown opaque color with a little oil residue on top. When done, pull the bag out of the bowl. You can either drink directly from the bowl or transfer it to a glass or bottle.
After kneading, squeeze it to release more liquid. Then repeat the process for a few minutes more.
In my opinion kava is best served cold, so you can go ahead and chill it for a few hours or days.
Kava with an Old T-shirt
How to Make Kava With an Old T-shirt
Do you still have your old shirts that you’ve been meaning to throw out but couldn’t find time to do so? Now is the perfect time to make use of it. You can make a kava strainer out of your old shirts.
Since most of our shirts are made out of cotton, it can be a great substitute for the kava strainer bag. Although other types of fabric like polyester, tri-blend, bamboo, etc. could work, we mostly preferred using cotton shirts. Especially when brewing strong kava using our method, where in we use hot water. We recommend to stay away from thicker styles like wool.
Prepare the following:
-2-3 tablespoons of kava traditional grind powder
-16 ounces of room temperature water
-1 bowl to mix in
-1 old shirt
Process:
You can either cut it or just leave the shirt as it is. Lay your shirt flat on top of your table. It is best to use just one layer of your shirt in order to prevent the actives from getting stuck in between layers. Put the kava powder in the center of your shirt, then bring in the corners and tie your shirt with a rubber band or string to make it look like a sack. Put it in the bowl, then pour water on it. You can now start kneading your kava inside the shirt in the water.
I'll copy and paste the above kneading method: Knead the kava with your hands like you're squishing a stress ball and later wringing it like you're getting the water out of a wet shirt. We recommend squeezing the material for at least 10-15 minutes. The liquid should have turned into a light or dark brown opaque color with a little oil residue on top. After kneading, squeeze it to release more liquid. Then repeat the process for a few minutes more.
Lastly, pull the shirt with kava from the bowl. You now have yourself a bowl of traditional kava.
You can either drink directly from the bowl or transfer it to a glass or bottle. In my opinion kava is best served cold, so you can go ahead and chill it for a few hours or days.
Kava with Pantyhose/Knee High
How to Make Kava with Pantyhose/Knee High
Pantyhose are made of nylon, which makes them a great alternative to kava strainers, which are also made from nylon. According to kava forums, most kava users use pantyhose instead of the kava strainer bags because it is more affordable. And it works closely with the kava strainers. Doubling up the pantyhose use when making kava produces better results, as it will help strain the kava powder more effectively.
Prepare the following:
-2-3 tablespoons of kava traditional grind powder
-16 ounces of room temperature water
-1 bowl to mix in
-1 pantyhose/knee high
Process:
Grab a clean pair of stockings, either pantyhose or knee high. You can cut it so that it’s easier to insert the kava powder, or you can just leave it be. Double up your stockings for better filtering. Put the stockings inside the bowl. Next, pour kava powder into the stocking, then pour water inside. Tie your stockings to secure the kava powder inside.
I'll copy and paste the above kneading method: Knead the kava with your hands like you're squishing a stress ball and later wringing it like you're getting the water out of a wet shirt. We recommend squeezing the material for at least 10-15 minutes. The liquid should have turned into a light or dark brown opaque color with a little oil residue on top. After kneading, squeeze it to release more liquid. Then repeat the process for a few minutes more.
Lastly, pull the stockings with kava from the bowl. You now have yourself a bowl of traditional kava.
When done, pull the bag out of the bowl. You can either drink directly from the bowl or transfer it to a glass or bottle. In my opinion kava is best served cold, so you can go ahead and chill it for a few hours or days.
Kava with Socks
How to Make Kava With Socks
-2-3 tablespoons of kava traditional grind powder
-16 ounces of room temperature water
-1 bowl to mix in
-1 thin sock
Process:
Make sure your socks are clean. No one wants foot funk in their kava, including you (hopefully). Put the kava powder inside the sock. Grab your bowl, put the sock with kava in it, then pour water inside the sock. Close the sock using a rubber band or string. After that, you can go ahead and start kneading and squeezing your kava.
I'll copy and paste the above kneading method: Knead the kava with your hands like you're squishing a stress ball and later wringing it like you're getting the water out of a wet shirt. We recommend squeezing the material for at least 10-15 minutes. The liquid should have turned into a light or dark brown opaque color with a little oil residue on top. After kneading, squeeze it to release more liquid. Then repeat the process for a few minutes more.
Lastly, pull the socks with kava from the bowl. You now have yourself a bowl of traditional kava.
When done, pull the bag out of the bowl. You can either drink directly from the bowl or transfer it to a glass or bottle. In my opinion kava is best served cold, so you can go ahead and chill it for a few hours or days.
Kava with Cheesecloth
How to Make Kava With Cheesecloth
Cheesecloth is another option to use when brewing kava. Although it doesn’t appear to be more effective compared to the other ones mentioned above, mainly because more sediment tends to go through that fabric. What you can do is to fold the cheese cloth a few times, just enough to filter the sediments.
Prepare the following:
-2-3 tablespoons of kava traditional grind powder
-16 ounces of room temperature water
-1 bowl to mix in
-1 cheesecloth
Process:
Lay the cheesecloth in the bowl. Put the kava powder in the middle, then tie the cheesecloth with a rubber band or string to secure the powder, forming a sack. (similar to the shirt). Pour water on to the cheesecloth with kava. Knead and squeeze the cheesecloth with kava repeatedly for a few minutes.
I'll copy and paste the above kneading method: Knead the kava with your hands like you're squishing a stress ball and later wringing it like you're getting the water out of a wet shirt. We recommend squeezing the material for at least 10-15 minutes. The liquid should have turned into a light or dark brown opaque color with a little oil residue on top. After kneading, squeeze it to release more liquid. Then repeat the process for a few minutes more.
Lastly, pull the stockings with kava from the bowl. You now have yourself a bowl of traditional kava.
When done, pull the cheesecloth out of the bowl. You can either drink directly from the bowl or transfer it to a glass or bottle. In my opinion kava is best served cold, so you can go ahead and chill it for a few hours or days.
Kava with an Aeropress
How to Make Kava With an Aeropress (and a Blender)
Aeropress are normally used to make coffee manually, but it can also be a way to make kava if you already have one handy and don’t have a strainer (or shirt.. but how can you not have shirts?!). It may be costly, but it can also be effective. It can stop any sediment from getting into the cup because of its paper or metal filter. Keep in mind that using an aeropress is a different method from the traditional one, so people may baulk at you for being so snobby.
Prepare the following:
-2-3 tablespoons of kava traditional grind powder
-16 ounces of room temperature water
-1 bowl / cup
-1 blender
-1 aeropress
Process:
The traditional kava powder must be blended first on high for around 5-8 minutes on high, before adding it to the aeropress chamber. Aeropress uses filters to drain the powder. We prefer using a metal filter instead of paper filters and the paper filters tends to block the oils. Pour water into the chamber, making sure the powder is completely submerged. Attach the cap, secure the lock, then flip onto the cup and start pressing. When you notice the kava extract gradually dripping from the chamber, you'll know it's working. Keep pressing all the way down and when the plunger reaches the bottom, keep pressing and put some “oomph” into it. This extra pressure will help to bring out some kavalactone actives.
Again, this is not the best way to brew, but it can be done in desperate circumstances. It's also very helpful if you’re using a little hotter water since the aeropress is designed to handle boiling water.
Kava with a Kitchen Steel Strainer
How to Make Kava With a Kitchen Steel Strainer (and Blender)
If you don’t have any of those mentioned above, a bowl shaped steel strainer with fine mesh can work but you may get a weak grog (drink) . Although it is not highly recommended by most kava users because some sediments tend to go through and it’s not very efficient.
Prepare the following:
-2-3 tablespoons of kava traditional grind powder
-16 ounces of room temperature water
-1 bowl
-1 blender
-1 kitchen strainer
Process:
Blend your traditional kava powder with water on high. Position the strainer on top of the bowl. Pour the kava blended sludge into the strainer. You can press the kava powder on the strainer using a ladle to get more liquid extracted from the moist roots. When done, you can now enjoy your kava.
Frequently Asked Questions
How can I make my kava stronger?
One way to make your kava stronger is to add fatty liquid during extraction. Some of the choices can be coconut milk, whole milk or even almond milk. These fatty liquids will help extract more the kavalactone from the roots.
How much is too much?
The 300mg limit is the one recommended by the World Health Organization. We regularly see supporters drink far beyond that number, and it's common in Fiji to knock back multiple bowls as well. However, we just recommend against it to be safe. This us kind of like how they recommend you to only have 2 glasses of wine max, or 600mg of advil max for that matter).
How to make kava taste better?
Kava can be pretty challenging to drink because of it's strong taste. Luckily, kava can be mixed with almost any of your favorite drinks. You can even mix it with any of your favorite juices or even milk or chocolate drink. One of our favorites is the margarita mix. You can also check some of our favorite recipes from our blog here.
Can you drink kava without straining?
We don't really recommend drinking traditional kava powder without straining. One of the reasons is that kava root particles may upset your stomach and it's also best to just stick to the way kava has been traditionally used for thousands of years. Don't try to "fix" something that's not broken.
Conclusion
Making kava using the traditional method is simple. You just need your kava strainer bag, traditional kava powder, a big bowl, and water. You can also use your old shirt, pantyhose, socks, cheesecloth, aeropress, or even a bowl shaped steel strainer if you run out of kava strainers. Please keep in mind that these alternatives may or may not work exactly the same as the kava strainer bag.
Leave a comment
Comments will be approved before showing up.


